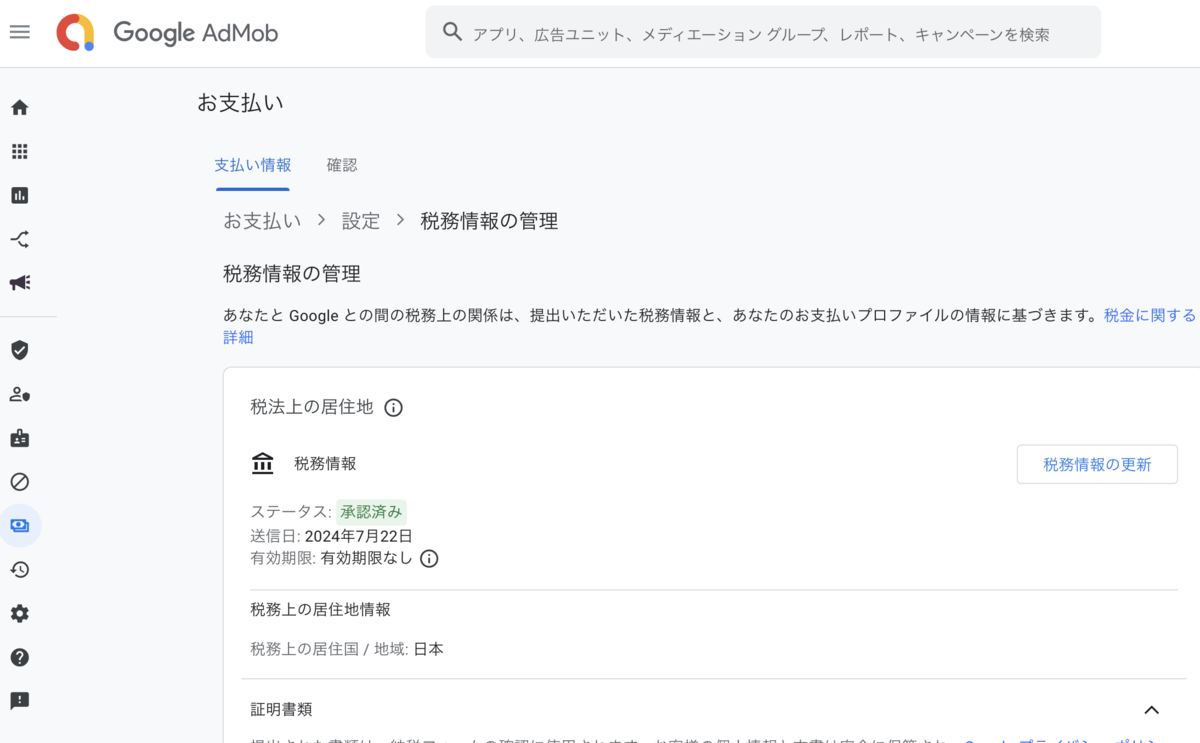
Googleに提出する居住者証明書の入手方法
Google AdMobの「税法上の居住地」にアップロードする「居住者証明書」の入手方法をメモ。
以下に請求方法が書いてある。
「請求方法」のセクションから引用
居住者証明書の交付請求を行う場合は、所轄の税務署(管理運営部門)に①居住者証明書(2部)、および②(居住者証明書の)交付請求書を(郵送または来署により)提出してください。

なお、①または②が外国語で作成されている場合は、併せて③その和訳を提出してください。

※ 代理人が請求する場合は、代理の権限を有することを証明した任意の書類を添付してください。

※ 来署される場合は、ご本人であることが確認できる書類(マイナンバーカード(個人番号カード)、運転免許証、パスポート、国または地方公共団体の機関が発行した顔写真付きの身分・資格証明書等)をお持ちください。

※ 郵送で請求される場合は、封筒の表面に「居住者証明請求在中」と記載していただいた上で、所要の切手を貼った返信用封筒を同封して送付してください。
「居住者証明書交付請求書・居住者証明書」の印刷用PDFをダウンロード・印刷して手書きでもいいが、
入力用PDFをダウンロードして、Acrobat Readerで入力後に印刷すると楽。
以下、入力に関するメモ。
- 英語の住所は https://kimini.jp/ が参考になる
- 「提出先の国」は
Republic of Singapore - 「対象期間」は空白にする
以下はすべてチェックする
□ 請求者は租税の適用上日本国の居住者であること
□ 当該請求は専ら居住性の証明のためになされること
□ 本請求書の情報は真正かつ正確であること
税務署への提出は2部必要なため、2部印刷する。
印刷した「居住者証明書交付請求書・居住者証明書」を持って税務署へ行くか、郵送で送る。郵送の場合は、以下。
※ 郵送で請求される場合は、封筒の表面に「居住者証明請求在中」と記載していただいた上で、所要の切手を貼った返信用封筒を同封して送付してください。
補足
- アメリカ合衆国の税務情報は以下が詳しい
iOS シミュレータのステータスバーに表示される時刻を変更

xcrun simctl で変更できる↓
xcrun simctl status_bar "iPhone 11 Pro Max" override --time "9:41"
iOS 16シミュレータだとうまく設定できないことあるので、それ以外のOSで試すと良い
起動しているシミュレータ名を指定しているのに以下のエラーが出る場合は
Unable to lookup in current state: Shutdown
xcrun simctl list devices booted で起動しているシミュレータのIDを確認して
% xcrun simctl list devices booted
== Devices ==
-- iOS 16.4 --
-- iOS 17.0 --
-- iOS 17.2 --
-- iOS 17.5 --
    iPhone 11 Pro Max (XXXXXXXX-XXXX-XXXX-XXXX-XXXXXXXXXXXX) (Booted)
シミュレータのID指定で時刻設定すると良い。
xcrun simctl status_bar XXXXXXXX-XXXX-XXXX-XXXX-XXXXXXXXXXXX override --time "9:41"
ライブラリ管理を CocoaPods から Swift Package Manager(Xcode)へ移行する
以下のライブラリを CocoaPods で管理していたが、Swift Package Manager(Xcode)管理に移行してみる。
- SwiftLint
- LicensePlist
- Firebase
- AnalyticsWithoutAdIdSupport
- Crashlytics
以下が、その手順。
CocoaPods でのライブラリ管理を削除
まず CocoaPods でのライブラリ管理をやめる。
以下を実行して、*.pbxproj から Pods_XXX.framework への参照と Pods フォルダを削除する。
pod deintegrate
上記コマンドでは消えない CocoaPods 関連のファイルを、手動で削除する。
- *.xcworkspace
- Podfile
- Podfile.lock
※必要に応じて .gitignore からも CocoaPods 関連ファイルの記述を削除する(たとえば、 Pods フォルダとか)
Xcode で *.xcodeproj を開く。
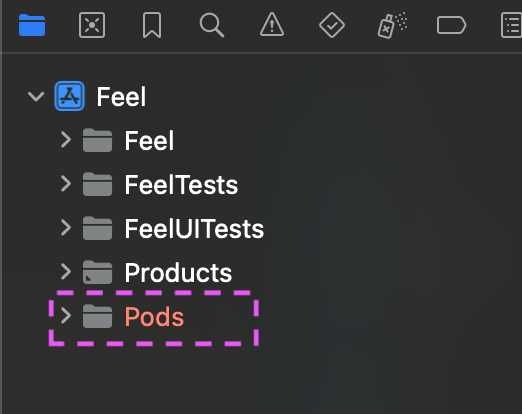
Xcode 左側の Project Navigator に Pods フォルダの参照が残っている場合は、削除する。
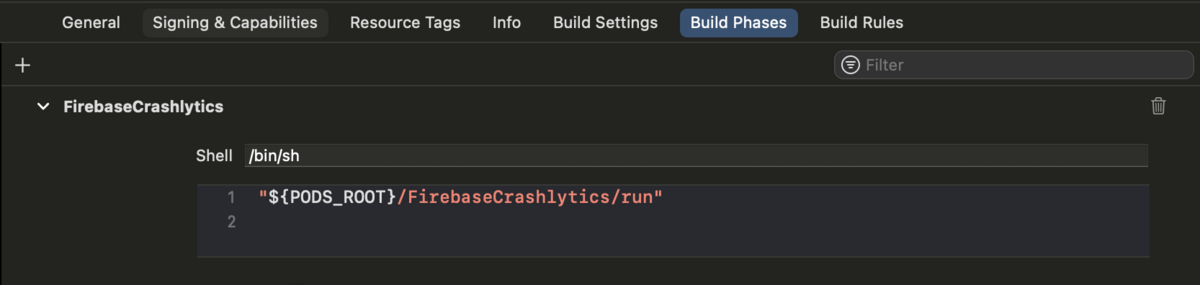
BuildPhase にある Pods を利用した SwiftLint, LisencePlist, Crashlytics のスクリプトを削除する。


Swift Package Manager でライブラリを追加
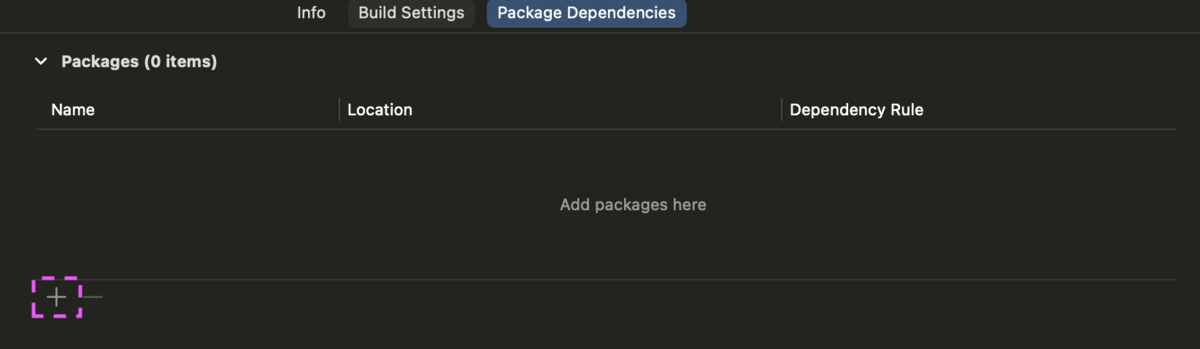
Package dependencies から + ボタンをクリックしてライブラリを追加する。
SwiftLint
公式ドキュメントのこのあたりが参考になる。
パッケージ追加の画面で以下を検索して、Add Package する。
https://github.com/realm/SwiftLint
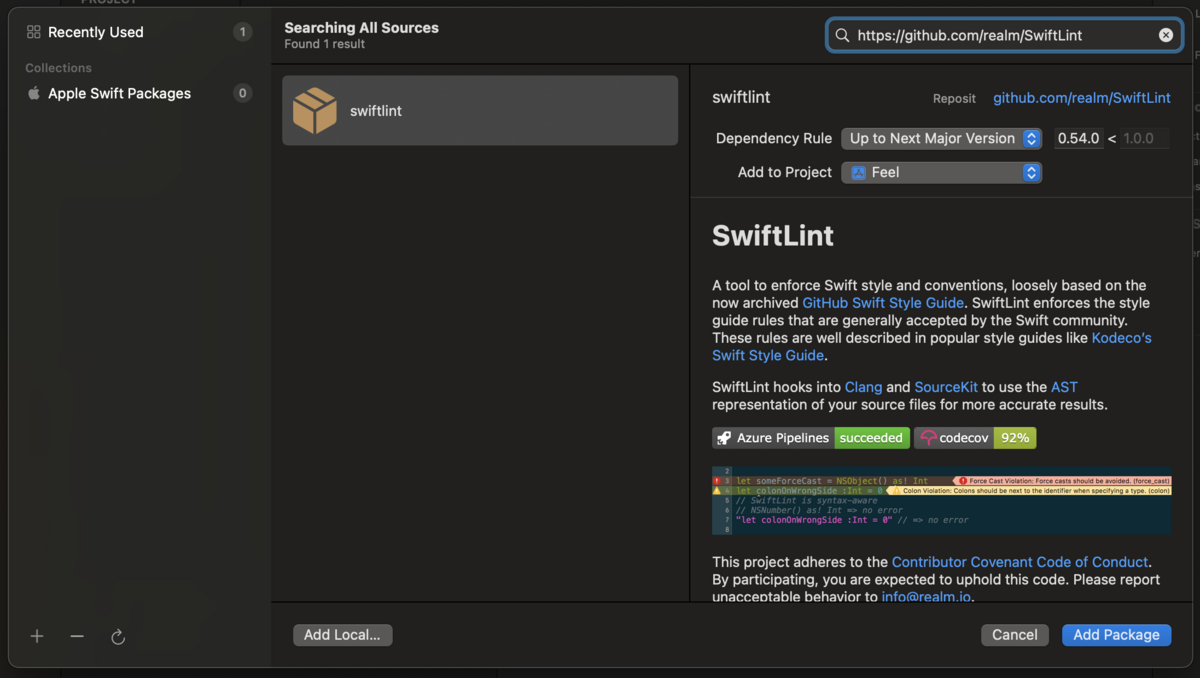
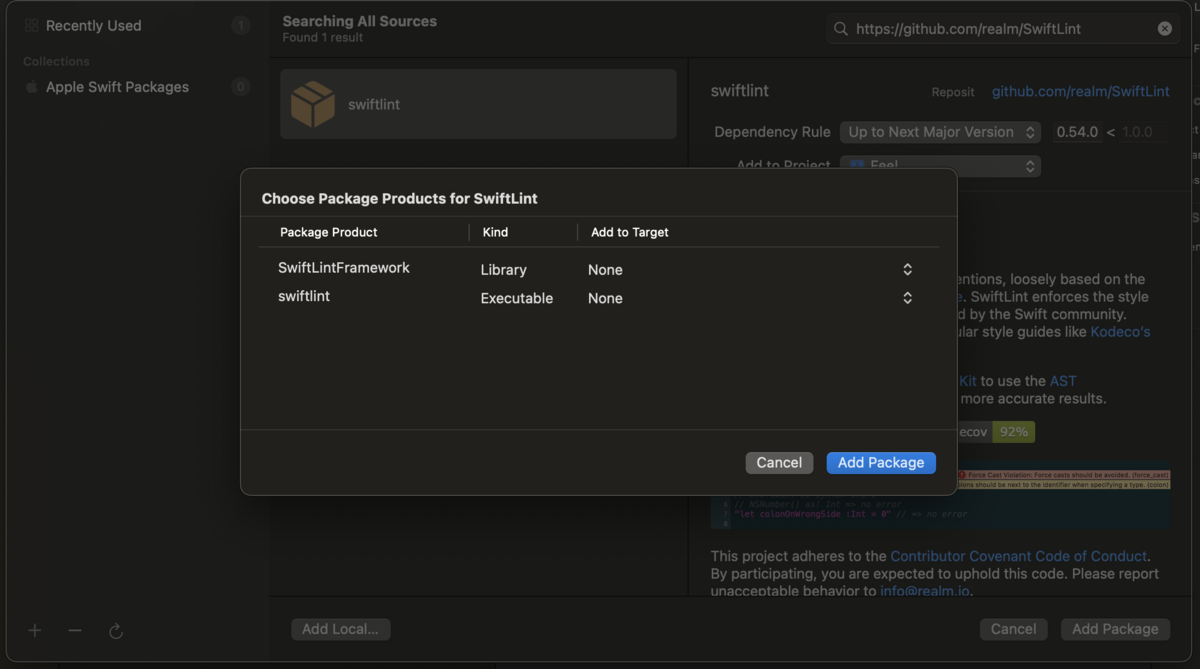
Package Product をターゲット追加する画面が表示されるので、すべて「None」を選び、ターゲット追加しない。Add Package を押す。
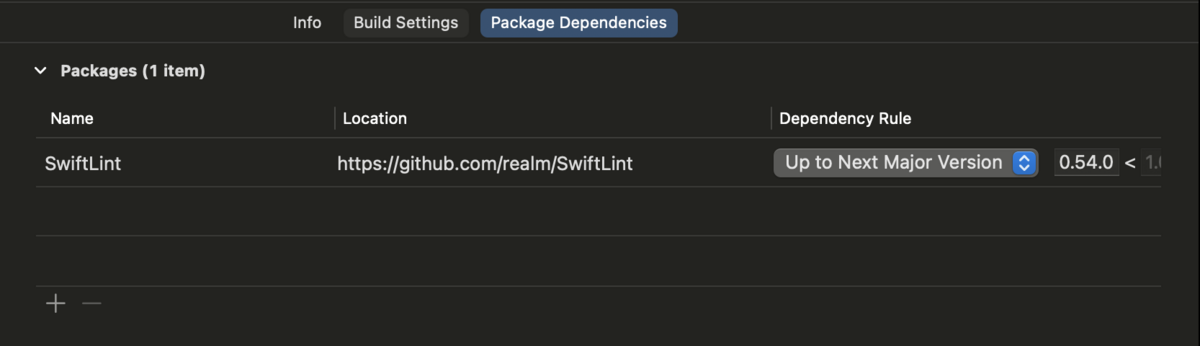
Xcode プロジェクトに Package が追加されたことが確認できる。
次に、Lint が実行されるように、Build Tool Plug-ins を設定する。
Lint 対象のターゲットを選び、Build Phases から Run Build Tool Plug-ins の項目を開き、+ボタンを押す。
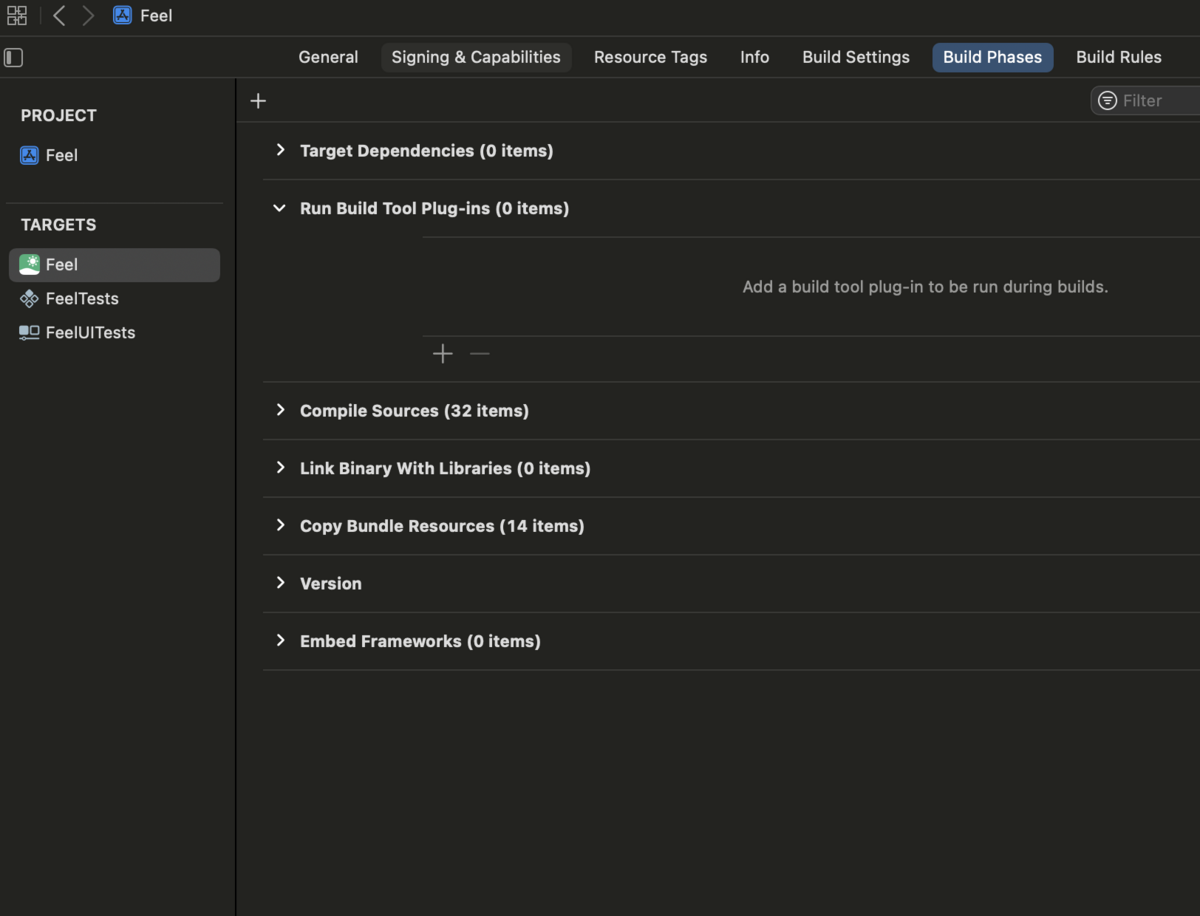
SwiftLintPlugin を選び、Add する。

SwiftLintPlugin が追加されたことが確認できる。

この状態で、ビルドすると SwiftLint が実行される。
プロジェクトのルートフォルダに .swiftlint.yml がある場合は、そこから Lint の設定が読み込まれる。
LicensePlist
公式ドキュメントのこのあたりが参考になる。
パッケージ追加の画面で以下を検索して、Add Package する。
https://github.com/mono0926/LicensePlist
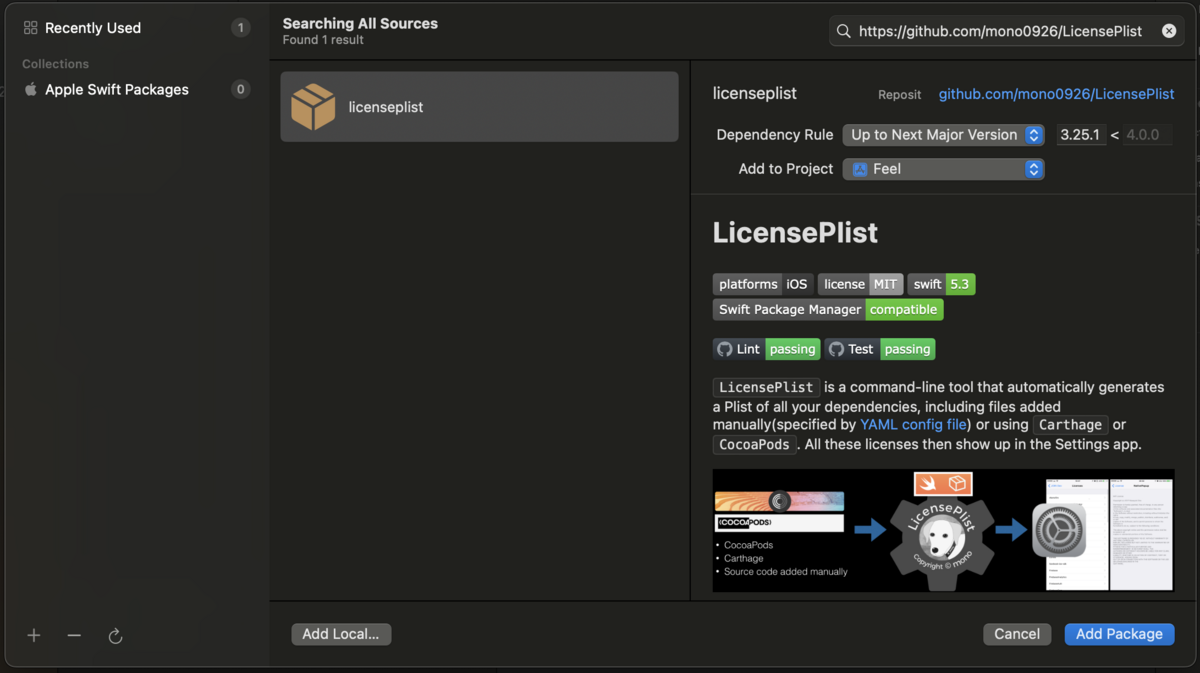
Package Product をターゲット追加する画面が表示されるので、すべて「None」を選び、ターゲット追加しない。Add Package を押す。
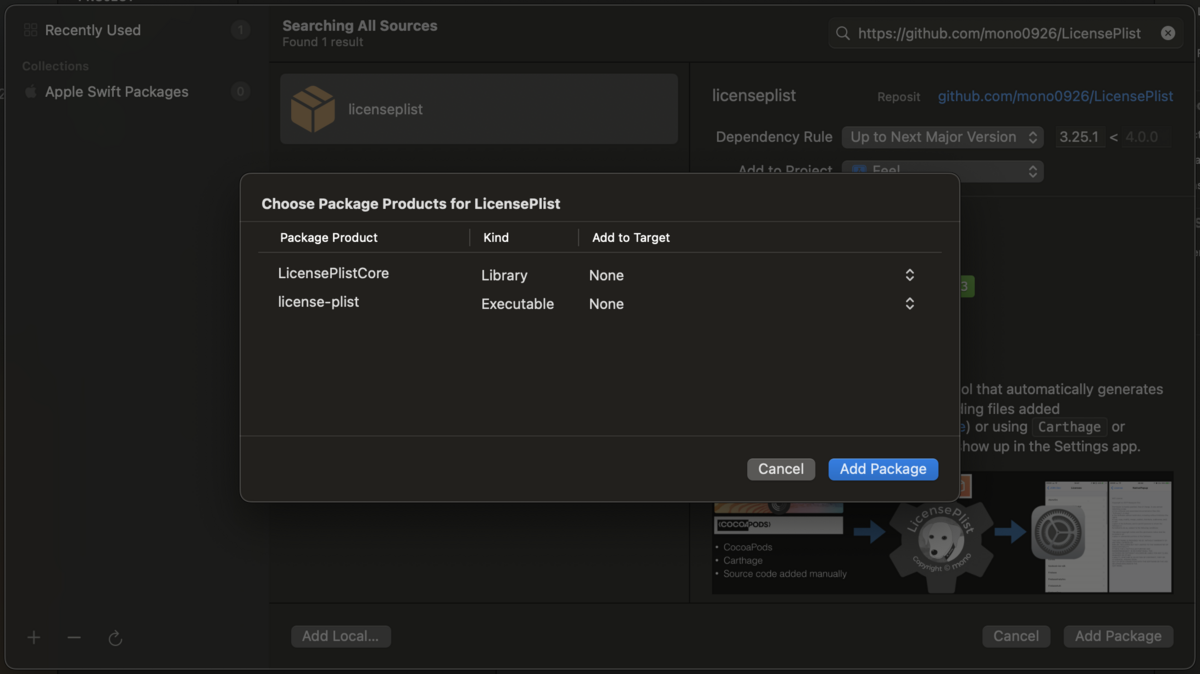
Xcode プロジェクトに Package が追加されたことが確認できる。

LicensePlist のファイルが生成されるように、Build Tool Plug-ins を設定する。
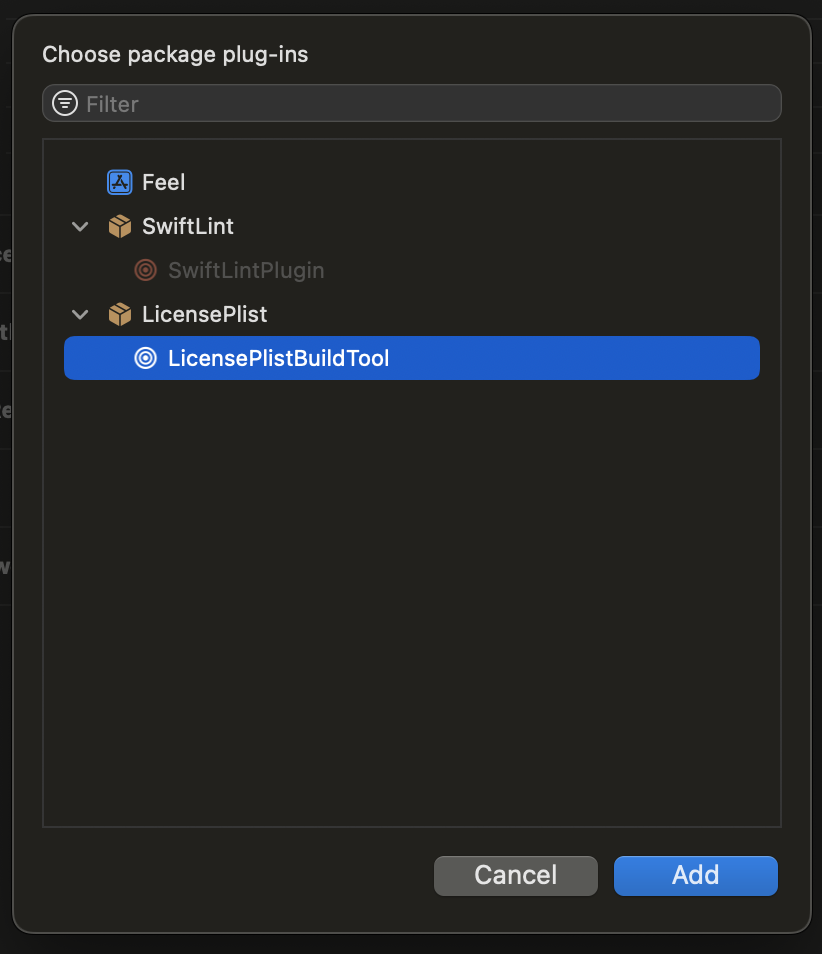
対象のターゲットを選び、Build Phases から Run Build Tool Plug-ins の項目を開き、+ボタンを押す。
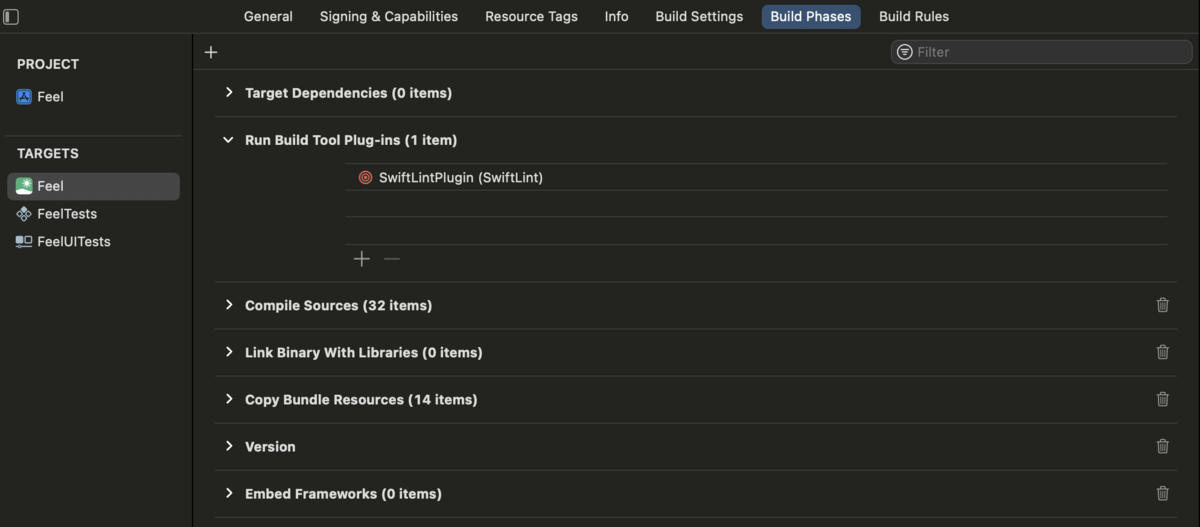
LicensePlistBuildTool を選び、Add する。
LicensePlistBuildTool が追加されたことが確認できる。

プロジェクトのルートフォルダに license_plist.yml を配置する。
最低限、以下の記述を追加する。
options:
  xcodeprojPath: "*.xcodeproj"  # 対象のプロジェクトファイルのパス
  gitHubToken: ghp_XXX  # GitHub トークン(LicensePlist は GitHub API を使うので、その制限エラーを避けるため)
Settings.bundle に LicensePlist の成果物をコピーする時には、公式ドキュメントにある以下のスクリプト(リンク)を BuildPhases に追加する。
echo "Will copy acknowledgements"
ACKNOWLEDGEMENTS_DIR=${BUILT_PRODUCTS_DIR}/${CONTENTS_FOLDER_PATH}/com.mono0926.LicensePlist.Output
DESTINATION_PATH=${BUILT_PRODUCTS_DIR}/${CONTENTS_FOLDER_PATH}/Settings.bundle/
cp -r "${ACKNOWLEDGEMENTS_DIR}"/* "${DESTINATION_PATH}"
rm -rf "${ACKNOWLEDGEMENTS_DIR}"
私の環境では、プロジェクト内にある Settings.bundle に成果物をコピーしたかったので、DESTINATION_PATH を変えて以下のようにした。
echo "Will copy acknowledgements"
ACKNOWLEDGEMENTS_DIR=${BUILT_PRODUCTS_DIR}/${CONTENTS_FOLDER_PATH}/com.mono0926.LicensePlist.Output
DESTINATION_PATH=${PRODUCT_NAME}/Settings.bundle/
cp -r "${ACKNOWLEDGEMENTS_DIR}"/* "${DESTINATION_PATH}"
rm -rf "${ACKNOWLEDGEMENTS_DIR}"
Firebase
公式ドキュメントに Swift Package Manager の導入方法があるので、それに沿って導入できる。
パッケージ追加の画面で以下を検索して、Add Package する。
https://github.com/firebase/firebase-ios-sdk.git
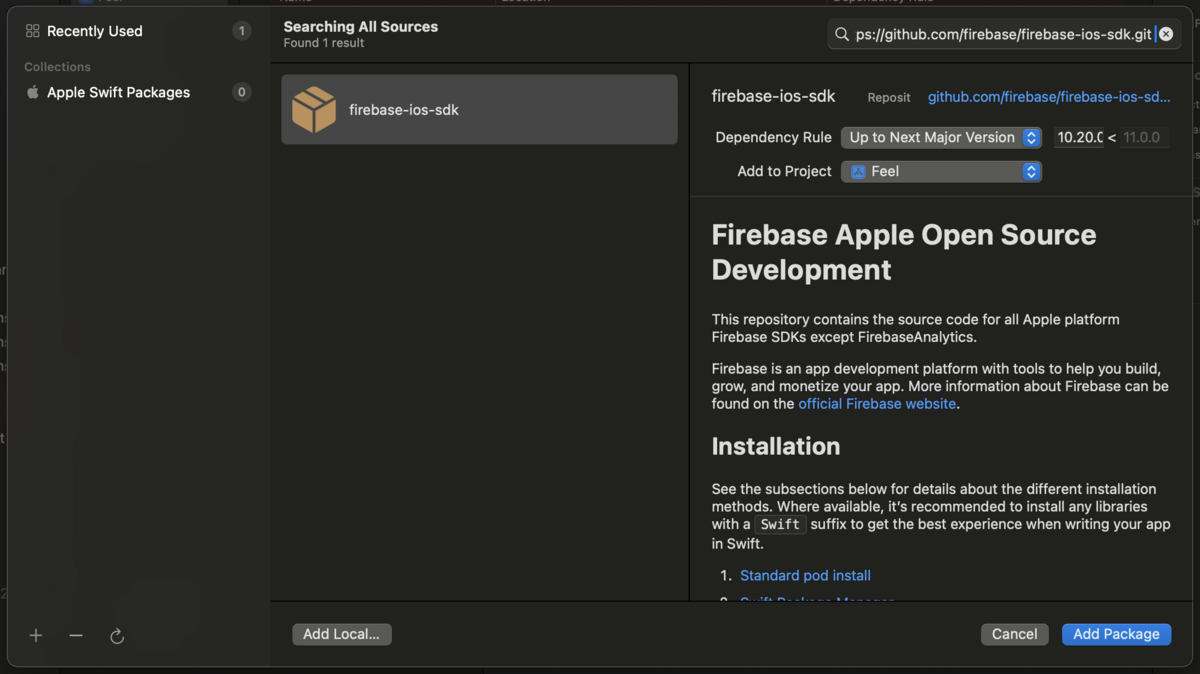
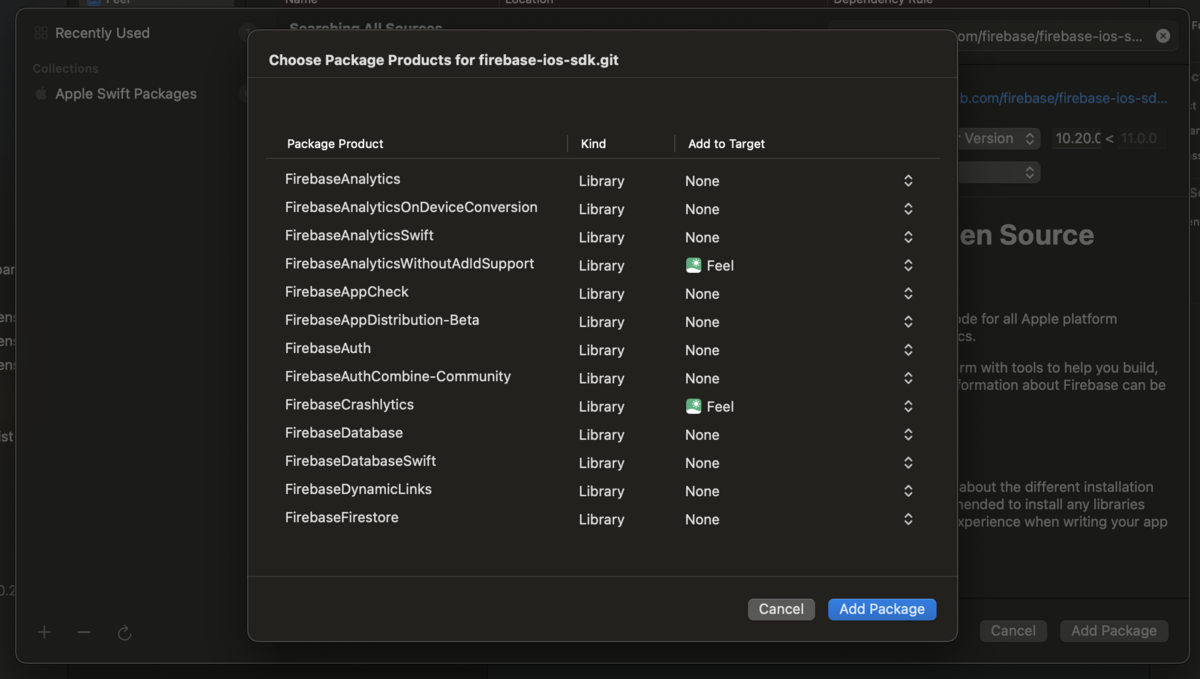
Package Product をターゲット追加する画面が表示されるので、使用するプロダクトを選んで、Add Package する。
今回は、Pods で AnalyticsWithoutAdIdSupport, Crashlytics を入れていたので、それらにターゲットを設定する。
Xcode プロジェクトに Package が追加されたことが確認できる。

Crashlytics を使用する場合、ビルド後にデバッグシンボルをアップロードするシェル(リンク)を BuildPhases に追加する。
${BUILD_DIR%Build/*}/SourcePackages/checkouts/firebase-ios-sdk/Crashlytics/run
Firebase が正しく導入されたかをチェックするために、-FIRAnalyticsDebugEnabled を引数に追加してアプリを起動し、イベントを送信する。(最初のハイフンも含めることに注意)
Firebase Console の Debug View でイベントが確認できたら OK.
参考
iOS アプリで1画面だけ色の表示が違った件
具体的には LaunchScreen.storyboard に設定している色が、 Hex Color は同じだが、微妙に他の画面と表示が違う。
原因は Color Profile が「Generic RGB」になっていたので「sRGB」に変更したら解決。
現在の Xcode(Xcode 15)で storyboard 作ると sRGB でできるが(SwiftUI の Color もデフォルト sRGB)、結構古い Xcode で作ってある storyboard は Generic RGB のままなので注意が必要。
storyboard の Color Profile を確認・変更するには、カラーピッカーの 「...」となっているボタンを押すと
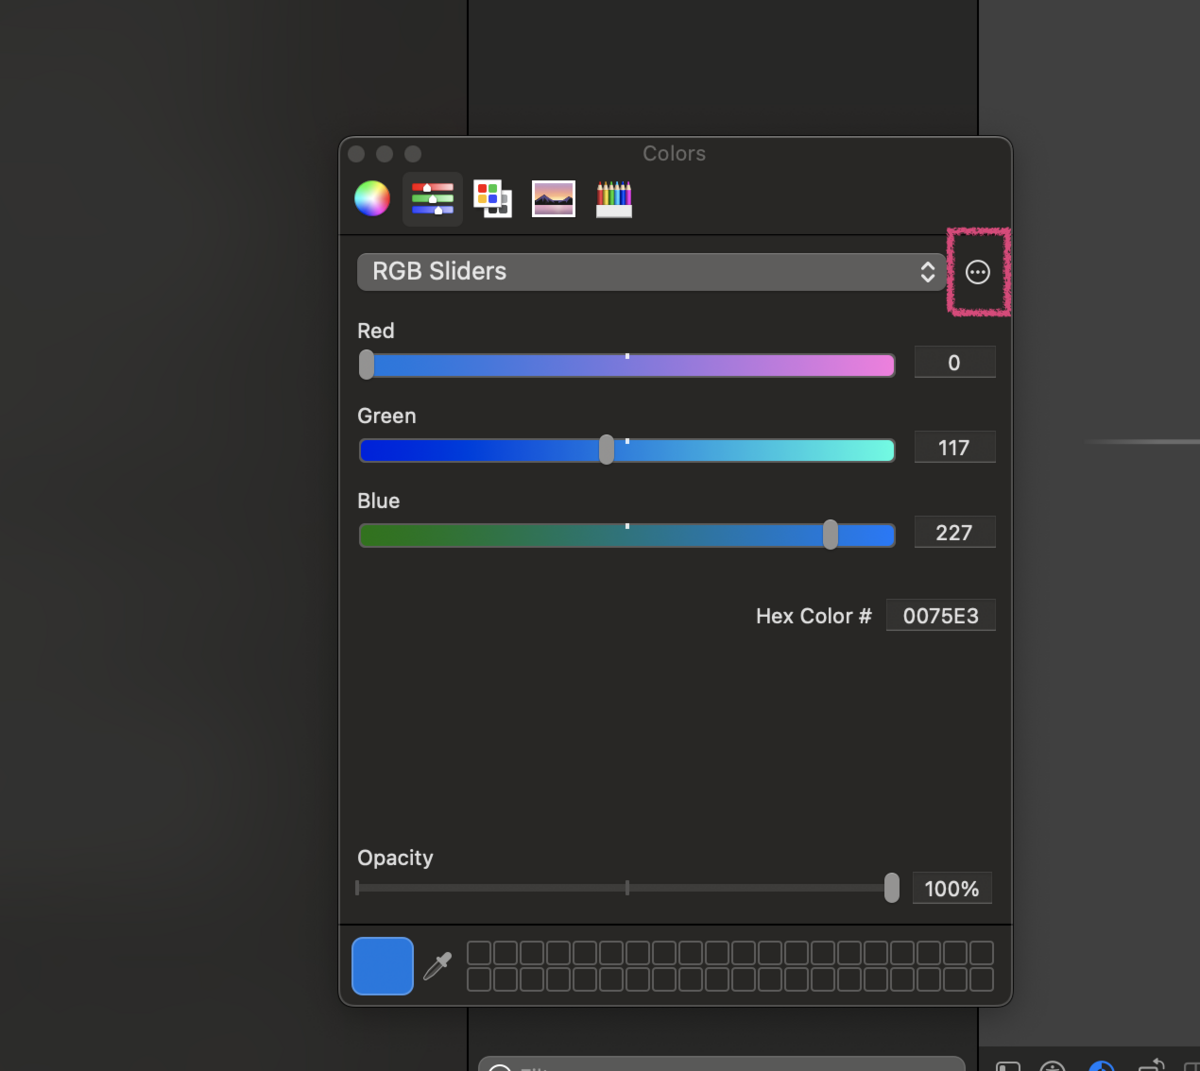
Color Profile のリストが表示されるので、そこから変更できる。(Color profile を変更すると、設定している色のコードも変わるので、また色のコードを設定しなおす必要がある)

本『プログラマのためのサバイバルマニュアル』の感想
コードの話から、仕事の進め方・考え方、自身の維持の仕方など、、、
いい本だと思う。

Xcode 14.3 で CocoaPods を使用しているプロジェクトのアーカイブが失敗する
Xcode 14.3 から CocoaPods を使用しているプロジェクトで、Archive を実行すると、以下のような rsync error... になって、アーカイブが作成されない。
rsync error: some files could not be transferred (code 23) at /AppleInternal/Library/BuildRoots/xxxxxxxx-yyyy-zzz-aaaa-bbbbbbbbbbbb/Library/Caches/com.apple.xbs/Sources/rsync/rsync/main.c(996) [sender=2.6.9]
対処法は以下。
まず、使用している CocoaPods のバージョンを v1.12.1 以降にする。
(たとえば brew で pod インストールしているならば、 brew upgrade cocoapods で更新できる)
更新後、 pod --version でバージョンが更新されていれば OK。
pod install する。
pod install 後に、
Pods フォルダ以下にできている Pods-XXX-frameworks.sh の中が
  if [ -L "${source}" ]; then
    echo "Symlinked..."
    source="$(readlink -f "${source}")"
  fi
↑のように readlink コマンドに -f オプションが付くようになっていれば、OK。
この状態で、アーカイブが成功するようになる。
NHK for School API を使った Flutter の習作
Flutter を作って何かアプリを作ってみようと思い、
NHK for School API という API を使って、アプリを作ってみた。
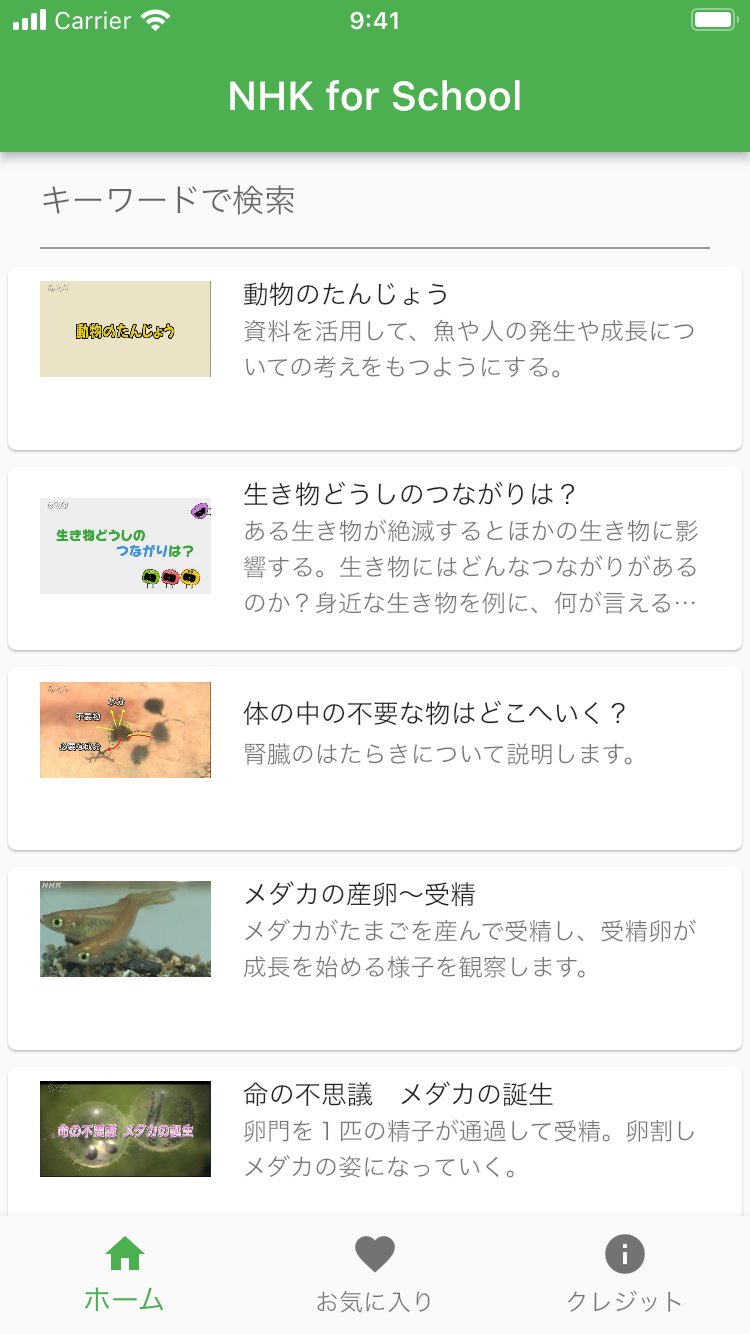

NHK for School API を使うと NHK for School 公開されているコンテンツを API で取得できる。
(すべてが取得できるわけでなく、現在だと小・中学校の理科と社会科のコンテンツだけのようだ)
このアプリ作成を通じて Flutter アプリでの以下の実現方法を学べた。
- HTTP によるデータ取得
- アプリ内データ保存(shared_preferences)
- 各 Widget の使い方(レイアウトの組み方など)
情報提供 NHK